In this post we will be seeing steps to create free AWS account. The perquisite for this post is system with good internet connectivity. Let’s create an account on AWS, A free trial account, which would enable us to use the feature of AWS in the learning of its Services. Please follow the below procedure to create an account.
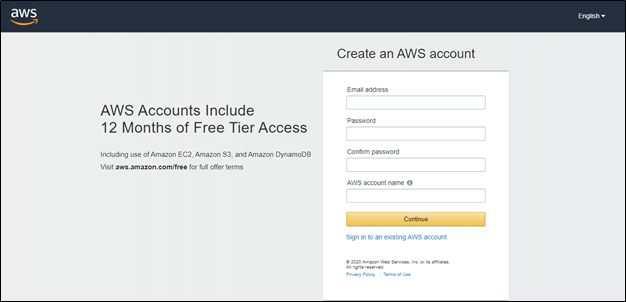
Step 1: Navigate to https://aws.amazon.com, this will get you to the AWS page, click on Create an AWS Account button to create an AWS Account.

Step 2: If we have any existing AWS account then click on a link to Sign in to an existing AWS account or if you are new to AWS enter all the details in the form, give a meaning full and unique name for AWS account name and click on Continue.
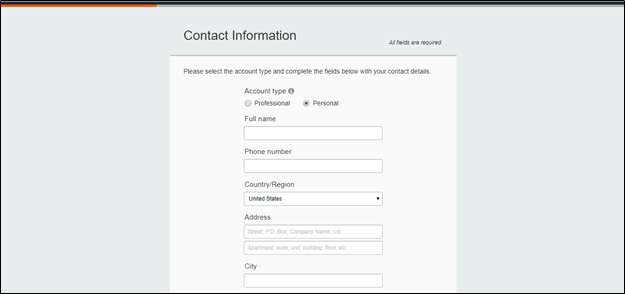
Step 3: Mention Contact Information in the below form, if you are individual then select Account Type as Personal, or if you are creating an account for any employer then Select it as Professional. Check the checkbox to accept the Terms and Conditions and click on Create Account and Continue.

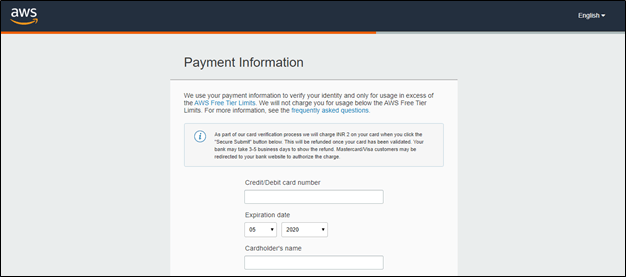
Step 4: Enter the Payment Information, this information is for billing purposes for the services that you use on AWS and to check the authenticity of the user. It will charge INR 2 or minimal account in accordance with region in which you are situated in. Enter the credit or debit details, if you want your contact address as billing address then select the radio button Use my contact address or select a new address. You can also provide your PAN number if you wish so or you can select NO radio button and proceed to verify and add.

Step 5: To Confirm your identity enter your cell phone and captcha, so you will receive a text message (SMS) or Voice call depending on verification code option selection.
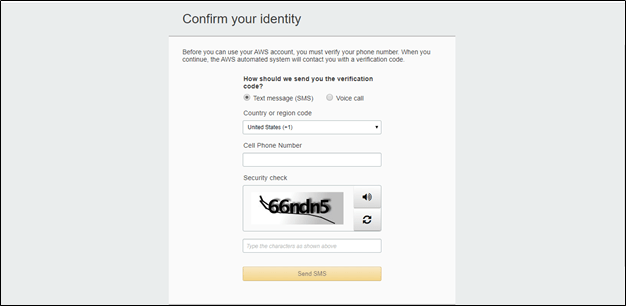
Step 6: On reception of the Code enter it in the textbox and click on Verify Code.

Step 7: On Successful verification you see a message as “Your identity has been verified successfully.”

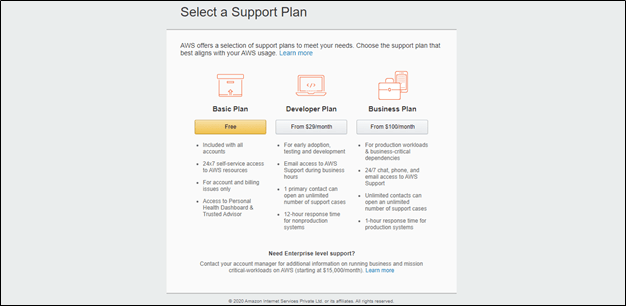
Step 8: Select a Basic Plan if you are new to the AWS.
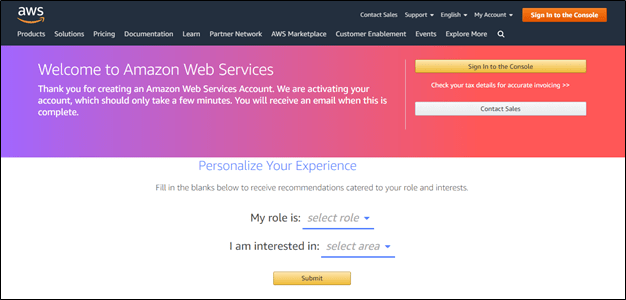
Step 9: To Personalize your Experience, select the role that you play in your organization or if you student the select appropriate role that suits you and select the area in which you are interested in.

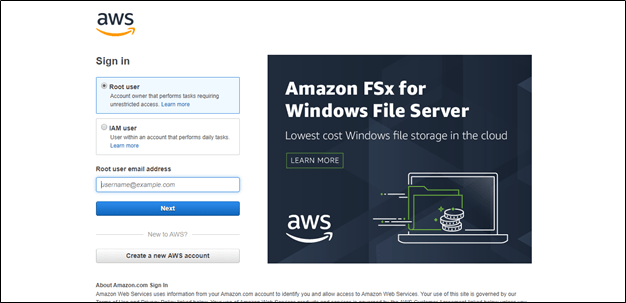
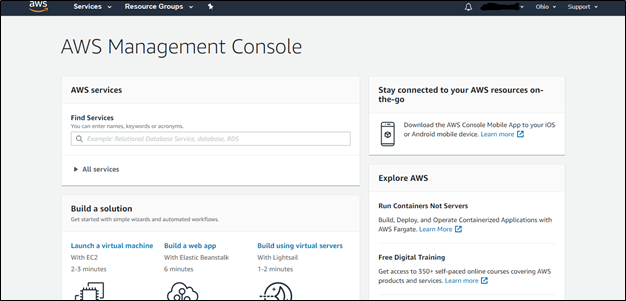
Step 10: Finally, Sign in using a Root user email Address and Password that you entered while creating the account. Sign in using IAM user is for the specific role or user that we create while using services to have certain privileges to perform tasks. On successful login you will be navigated to the main AWS Management Console.
This is how we can create an free tier AWS account. In the upcoming post we will learn to create an EC2 instance for Linux operating system.

One thought on “Steps to create free AWS account”